


For detailed information, other images and documents, please select individual articles from the following table.
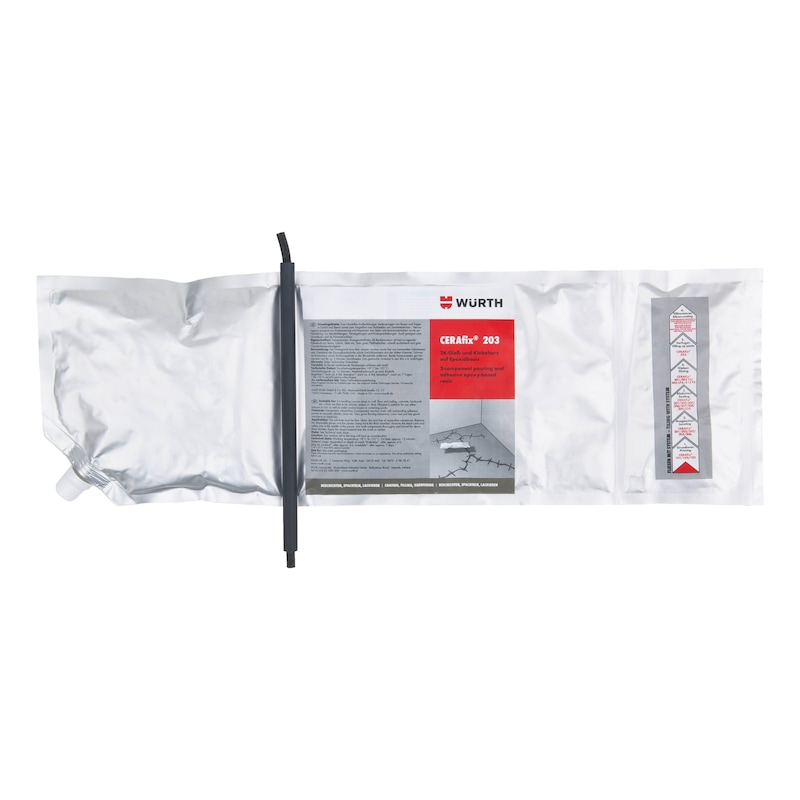


CERAfix 203 2C casting and adhesive resin
2C epoxy-based casting and adhesive resin for positive casting of cracks and joints in cement screed and concrete.

Register now and access more than 125,000 products

Variants
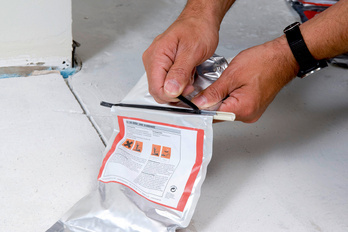
Three-chamber bag
- Very clean application, includes gloves and screed clips
- Pre-portioned sachets allow for easy, quick dispensing
- Easy to mix in the bag without the need for tools
Excellent creep and penetration properties
- Penetrates into the thinnest cracks
- Easy to use
Highly adhesive
- Creates durable, non-positive connections
- Excellent adhesion to mineral surfaces
Fast curing
- Reduces downtimes
- Reworking can be performed after a short time
Chemical resistant and therefore suitable for even highly demanding applications in trade and industry.
Resistant to water and frost once cured.
Suitable for underfloor heating and electric heating mats.
- Take care, as the remaining material in the sausage pack can get hot!
- Cannot be used for structural areas
- Do not seal cracks and dummy joints until the surface is ready to be covered
- Do not seal cracks and dummy joints until the screed has matured (permitted CM moisture)
- Moisture and contamination can severely impair the adhesion of the individual layers to each other!
- Higher temperatures shorten the application and curing time. Lower temperatures increase the application and curing time. The material consumption also increases at lower temperatures.
- After long interruptions/waiting times between the individual coats, the surface must be cleaned well and thoroughly sanded. A completely new casting resin must then be applied.
- After application, the layer must be protected from moisture. Exposure to moisture too early will cause whitening and/or tackiness of the surface and may cause the curing process to fail. Tacky or discoloured surfaces must be removed and reapplied.
- Cured product residues can be disposed of in accordance with waste code EAK 17 02 03, plastic. Liquid product residues can be disposed of in accordance with waste code EAK 08 01 11, paint and paint waste containing organic solvents or other hazardous substances.
- To assess how mature the covering is, perform a moisture measurement using the CM device.
- Edge, field, building and movement joints must be observed. These must be retained or incorporated at the prescribed location and sealed off by suitable means, e.g. edge strips!
- The technical data sheets of the products used must be observed!
- Protect surfaces that do not require treatment against exposure to CERAfix 203!
- Currently applicable regulations must be observed!
For example:
- DIN 18157
- DIN 18352
- DIN 18560
- DIN EN 13813
- DIN 1055
- TKB information sheets from Industrieverband Klebstoffe e. V. (Industry Association of Adhesives)
- BEB information sheets, published by Bundesverband Estrich und Belag e. V. (Federal Association for Screeds and Coverings).
- Technical information "Interface coordination for heated floor structures".
The usage instructions are recommendations based on the tests we have conducted and our experience; carry out your own tests before each application. Due to the large number of applications and storage and processing conditions, we do not assume any liability for a specific application result. Insofar as our free customer service provides technical information or acts as an advisory service, no responsibility is assumed by this service except where the advice or information given falls within the scope of our specified, contractually agreed service or the advisor was acting deliberately. We guarantee consistent quality of our products. We reserve the right to make technical changes and further develop products.
Cured product residues can be disposed of in accordance with waste code AVV 15 01 06.
CERAfix 203 is primarily used for pouring compound screeds with cavities and for producing positive bondings of cracks and joints in screed and concrete.
It is also suitable for use as primer resin, for touching up and repairing stone and concrete chips etc. where small quantities of resin are required. We recommend using CERAfix 103 if working over a large area.
CERAfix 203 is suitable for hot screeds, for indoor and outdoor use and for environments exposed to moisture.
For use as a binder for epoxy resin mortars to seal openings and around installed parts.
The below procedure for mixing applies to all applications
Wear suitable protective equipment, such as safety goggles/face protection and gloves! The hardener is acidic! Open the third chamber without damaging the other two chambers. Take out the disposable gloves and screed clips. Pull the round cord out of the securing strip to mix the contents of the first and second chambers. Knead and tilt the bag for approx. 3 minutes to thoroughly mix the two components. The ready-to-use material should be mixed into a homogeneous, streak-free mixture. Take care to avoid damaging the bag when mixing. Put on the gloves. Then open the screw cap and, if necessary, push on a piece of the plastic hose. Squeeze out the material and apply immediately.
1. Filling cavities
- Drill or expose the cavity. Drill a second ventilation hole to allow air to escape from the cavity.
- Thoroughly clean and remove any dust from the area.
- Then gradually pour the mixed casting resin into the cavity. Subsequent filling may be required. Material requirement: 1.1 kg/l volume
2. Filling cracks
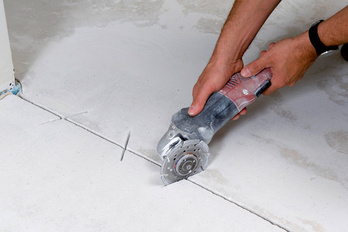
- Open up the cracks and use a cutting disc to make perpendicular cuts in the screed every 15 to 20 cm along the crack at a depth of between half and two-thirds of the screed's thickness. The perpendicular slits should be around 10 cm long and the crack should run roughly through the centre of the slits.
- Thoroughly clean and remove any dust from the area. For best results, use an industrial vacuum cleaner to carefully remove the dust.
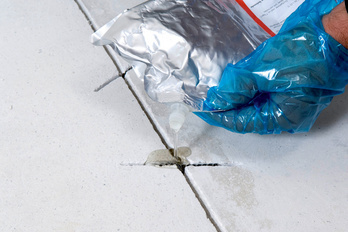
- Then gradually pour the mixed resin into the crack and cuts until they are visibly saturated. A piece of the supplied plastic hose can be attached to extend the spout.
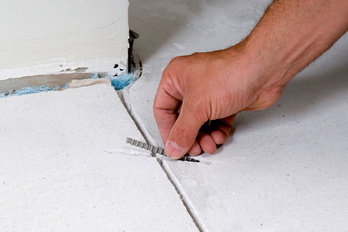
- Then insert the screed clips into the perpendicular slits and spread the emerging resin evenly along the surface.
- After approx. 30-45 minutes, spread fresh quartz sand with a grit of 0.2-1.0 mm diameter over the resin.
- After curing, brush off and vacuum the loose sand.
3. Priming
- Prepare and clean the substrate according to the substrate specifications.
- Pour the mixed resin onto the substrate and spread evenly until it is visibly saturated.
- After approx. 30-45 minutes, spread fresh quartz sand with a grit of 0.2-1.0 mm diameter over the resin.
- After curing, brush off and vacuum the loose sand.
4. Repairing chips
- Prepare and clean the substrate according to the substrate specifications.
- Then prime the area accordingly.
- To repair chips, prepare the mortar as follows: To repair deeper voids, prepare a mortar using CERAfix 203 bonding agent as follows: First add the quartz sand to the mixing bucket, then add the mixed resin. 1 part by weight of CERAfix 203: 7-10 parts by weight of quartz sand. Then mix into a homogeneous mixture. The required quartz sand grit is determined based on the coat thickness to be applied. The minimum coat thickness equates to approx. three times the largest grain size. The maximum coat thickness equates to approx. ten times the largest grain size. For example, the quartz sand used has a grit of 0-2 mm diameter. This produces a mortar that can be applied in layer thicknesses of approx. 6-20 mm.
- Apply, compress and smooth the mixed mortar over the freshly primed surface. Then immediately spread quartz sand with a grit of 0.2-1.0 mm diameter over the freshly laid mortar. Material requirement: Approx. 2.0 kg mortar per 1 m² and 1 mm coat thickness.
5. Scratch coats
- Prepare and clean the substrate according to the substrate specifications.
- Then prime the area accordingly.
- For scratch coats, prepare the mortar as follows: First add the quartz sand with a grit of 0.2-1.0 mm diameter to the mixing bucket; then add the mixed resin. 1 part by weight of CERAfix 203: 1-2 parts by weight of quartz sand. Then mix into a homogeneous mixture.
- Apply the mixed filler in a single coat using the scratch coat method. Material requirement: Approx. 1.6 kg mortar per 1 m² and 1 mm coat thickness
- Then immediately spread fine quartz sand with a grit of 0.2-1.0 mm diameter over the freshly laid filler.
Substrate
The substrate must be solid, load bearing, clean, dry and free from any adhesion-impairing substances. Remove any materials or coatings that impair adhesion, such as layers of sinter, dust, oil, paints etc., using suitable measures, such as blasting, milling, sanding, vacuuming and/or degreasing. The substrate must have sufficient load-bearing capacity for the active loads, see DIN 1055. For screeds laid on a separating or insulating layer, check that the surface is ready for covering before applying CERAfix 201. Concrete must have a minimum compressive strength of C20/25 in accordance with DIN 1045. Screed must comply with class C25-F4 in accordance with DIN EN 13813 as a minimum and must have been in place for 28 days. The CM moisture content must be less than 4 CM% for cement-based substrates. For calcium sulphate screeds without underfloor heating, the CM moisture content must not exceed 0.5 CM%. For calcium sulphate screeds with underfloor heating, it must not exceed 0.3 CM%. Follow the requirements for residual moisture levels for subsequent coverings. The moisture content must comply with the permitted residual moisture content stated in the most recent technical leaflets. Perform CM measurements in accordance with the most recent version of the "Interface coordination for heated floor constructions" work instruction. Prevent exposure to additional moisture. During application and in the week after, the temperature of the air, material and substrate must be at least +8 °C.
Select RAL-colour code
!! NOTE: On-screen visualisation of the colour differs from real colour shade!!